TeslaTech Install Instructions
Please follow these instructions to configure and install your new TeslaTech stuff.
- Install the Energy Meters
- Install the TeslaTech Cloud Archiver
- Create a ThingSpeak account
- Configure the TeslaTech Cloud Archiver
- Create a Twitter account for your Tesla
- Add the TeslaTech CAN Logger
- Install the TeslaTech Smart Charger
We offer a service to configure the TeslaTech Cloud Archiver, ThingSpeak and Twitter account. We strongly advice you to use this (currently free) service. We'll contact you by phone to exchange user data and passwords.
Step 1: Install the Energy Meters
If you did not purchage the Energy Meters, jump to Step 3.The energy meters need to be installed in the electricity cabinet of your house. This must be done by a qualified electrician. Call TeslaTech if you need help.
The Home Energy Meter must be installed after the main 300mA surge protector.
The Tesla Energy Meter must be installed after the Tesla power socket fuse.
The Solar Energy Meter must be installed after the Solar panel fuses.
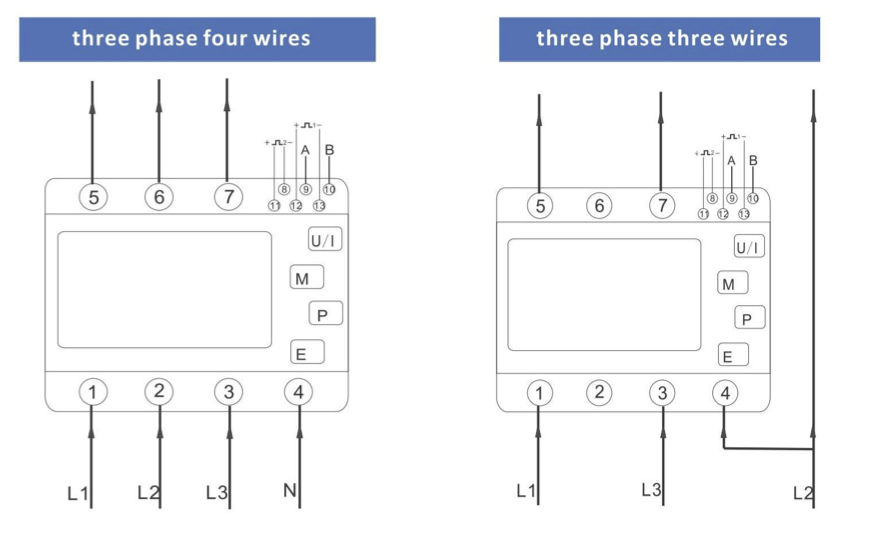
IMPORTANT: 3 Phase systems: The energy meters you received are clearly labelled 'HOME', 'TESLA' or 'SOLAR'. Make sure you install the correct energy meter on the correct location. The energy meters are pre-configured and they can not be interchanged without reconfiguration.
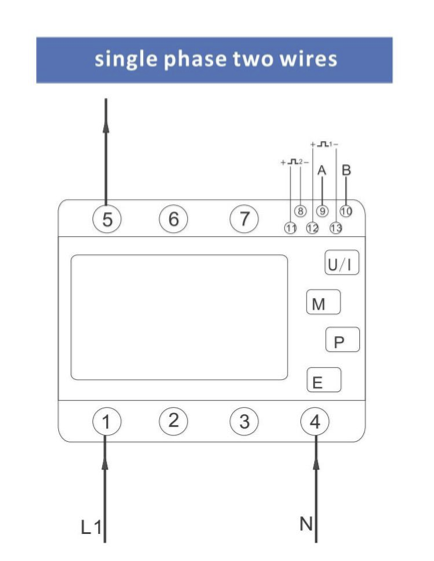
IMPORTANT: 1 Phase system: You only need one energy meter. L1 is used for the Home network, L2 for the Tesla connection, and L3 for the Solar Panel connection.
All our Energy Meters work with 3 Phase and 1 Phase networks. If you currently have a 1 Phase system, you can later upgrade to a 3 Phase system with the same Energy Meters.
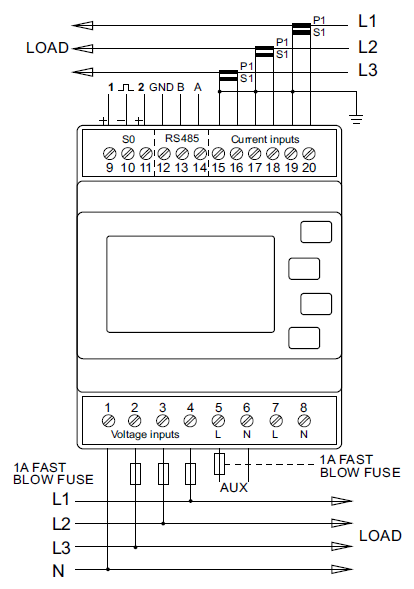
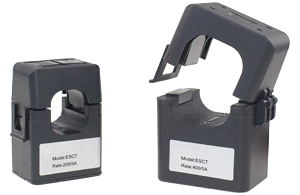
There are two versions available of the TeslaTech Energy Meter. The standard version must be installed inline with the electricity wires. This is the most complicated method but also the cheapest solution. This meter can work with currents up to 100Amps.
Step 2: Install the TeslaTech Cloud Archiver
Now this is the easy part. Unpack the TeslaTech Cloud Archiver and just plug it in a 230Volt socket. Make sure there is WiFi reception on the selected location. To reduce the length of the RS485 cable it's better to install the TeslaTech Cloud Archiver near the energy meters.There is a 5 meter cable included with each Energy Meter, if this is not long enough make sure to purchase a twisted pair screened cable.
All A and B connections, on all the energy meters and the TeslaTech Cloud Archiver, should be daisy chained together. Carefully check the location of the A and B terminals in the pictures of Step 1. The location of the terminals depends on the type of energy meter you ordered. The cable screen should be connected to the GND terminals (if available).
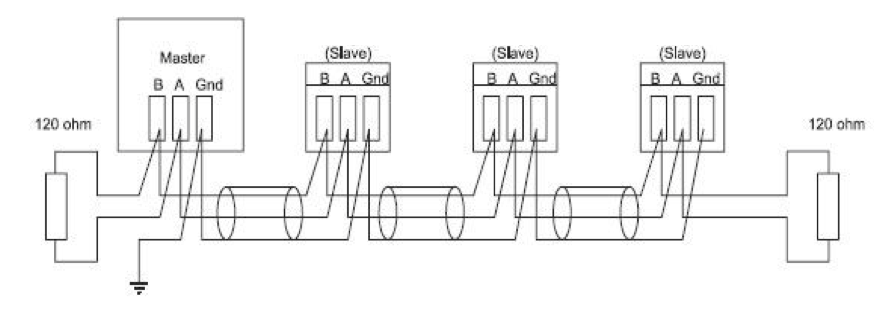
Now you should have a chain of multiple RS485 devices: TeslaTech Cloud Archiver - Energy Meter 1 - Energy Meter 2 - .... The total cable length should not exceed 1200 meter and maximum 32 devices can be connected. The last devices in this chain must be terminated with a 120 Ohm resistor. Make sure both resistors are connected to the terminals correctly.
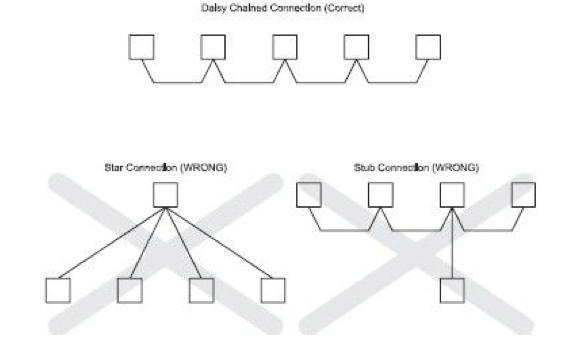
IMPORTANT: RS485 or Modbus does NOT allow star connections. All the devices must be connected in one line.
More devices can be connected to the RS485/Modbus. We will add firmware support for other solar energy meters and probably RS485 equipped solar inverters and car chargers.
Step 3: Create a ThingSpeak account
All data is stored in the cloud on your personal ThingSpeak account.Use your favorite browser and visit ThingSpeak

Once you've created your account click on Account and My Profile

Here you'll find the ThingSpeak 'API Key'
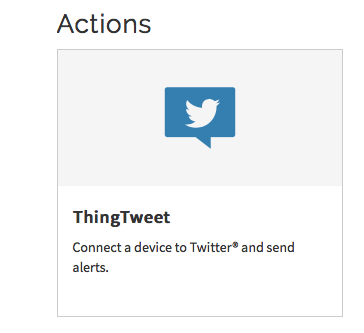
If you want to receive Tweets from the TeslaTech Cloud Archiver you'll need to create a Twitter account for your car (not your personal Twitter account). You'll need to authorize ThingSpeak to use this Car Twitter account. If you did not yet create your car's twitter account, please follow the instructions in Step 5, then return here. Of course, a Car Twitter account is not required and can be added later.
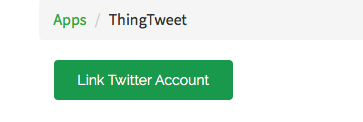
To authorize ThingSpeak click on 'Apps' in the main menu, then click on 'ThingTweet'

Finally click on 'Link Twitter Account'
Enter your CAR twitter account credentials and click Authorize app
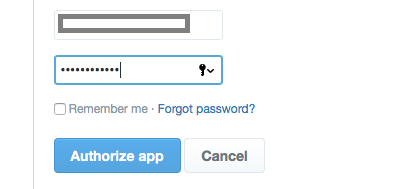
Follow the instructions and you'll end up with another API Key
This one is the Twitter API Key
Step 4: Configure the TeslaTech Cloud Archiver
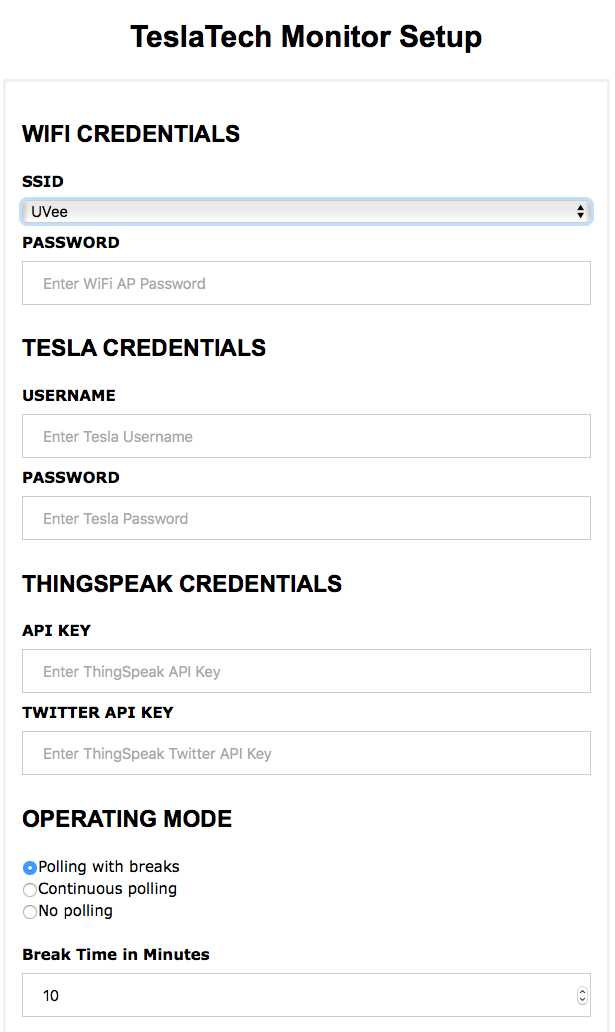
Make sure your TeslaTech Cloud Archiver is plugged in a 230Volt socket and there is WiFi reception available.Press the Config button on the TeslaTech Cloud Archiver for 2 to 5 seconds. The TeslaTech Cloud Archiver will create a WiFi AP with the SSID 'TeslaTech'. Connect your smartphone to this WiFi network.
Open a browser and enter this URL: 192.168.1.1
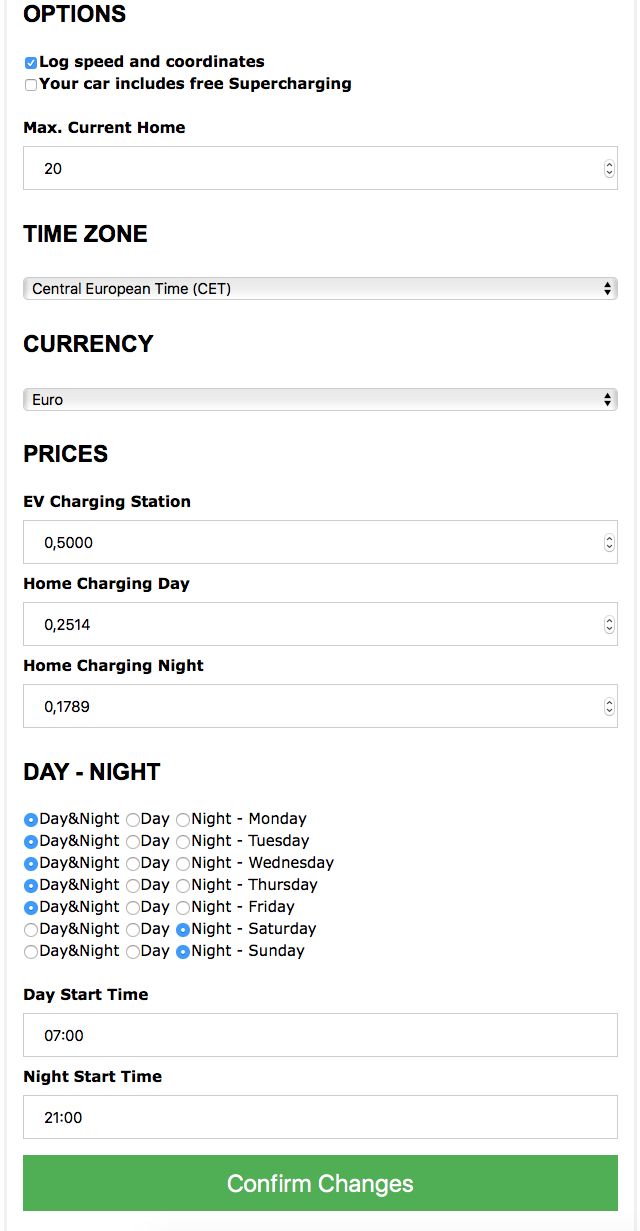
You'll see the configuration page of the TeslaTech Cloud Archiver. You must fill in the WiFi, Tesla and ThingSpeak credentials. Don't worry if you can't enter all the other information, you can make changes at any time later. Finally click 'Confirm Changes'.
Start a browser and go to the TeslaTech Cloud Archiver website.
If you don't get any data you probably made a mistake in the configuration settings. Just press the Config button on the TeslaTech Cloud Archiver for 2 to 5 seconds and restart the configuration (Step 4).

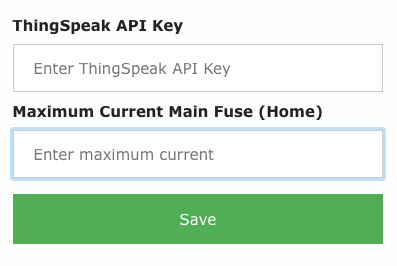
Fill in the fields. Make sure to enter the ThingSpeak API key correctly.
Remember you can always redo the configuration
Step 5: Create a Twitter account for your Tesla
Your car can send you tweets regarding its charging status and idle fees. You'll need to create a Twitter account for your car and of course also need one for yourselves. These install instruction presume you already have your personal twitter account and the Twitter app is installed on your smartphone. If not, first install the Twitter app and create a personal account.You can skip this step if you do not want to receive tweets. You can always enable tweets later.


Then follow the instructions to enter your name, ...


Now your cars Twitter account is created
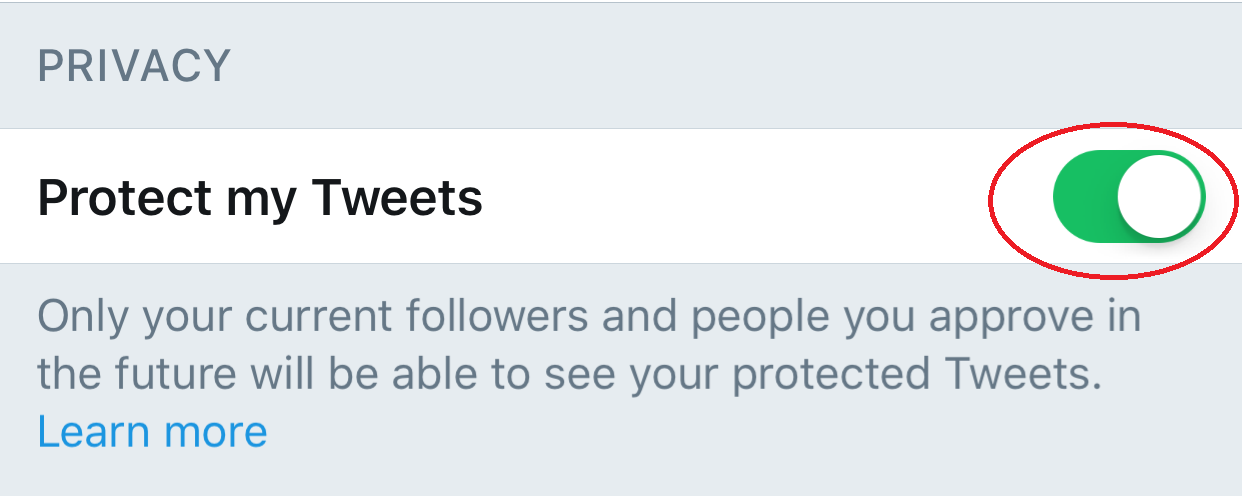
One setting must be changed


Close settings and return to the main screen
Touch Me and select your personal account (not your car account)
After you've selected your personal account

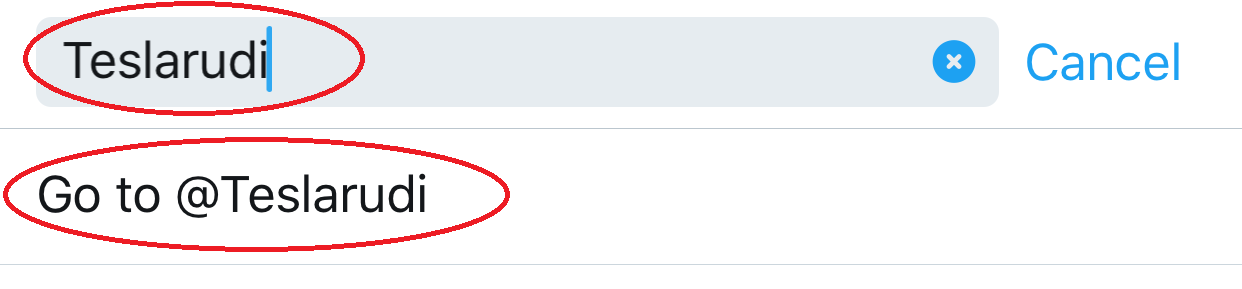
Enter your car account in the search field
Then touch Goto ...

Return to the main screen, touch Me and select your car account


You now have created a new Twitter account for your car
All tweets send by the Cloud Archiver through this account are private
And your personal Twitter account will receive the car tweets